Understanding Mobile Streaming vs. Studio Setups
At its core, live streaming involves capturing audio and video, encoding it, and transmitting it over the internet to an audience. Both mobile devices and studio setups achieve this, but they do so with different levels of complexity, flexibility, and output quality.
- Mobile Streaming: This method utilizes your smartphone’s built-in camera, microphone, and processing power. Apps like the CamStars mobile app handle the encoding and streaming directly from your device. It’s an all-in-one, highly portable solution.
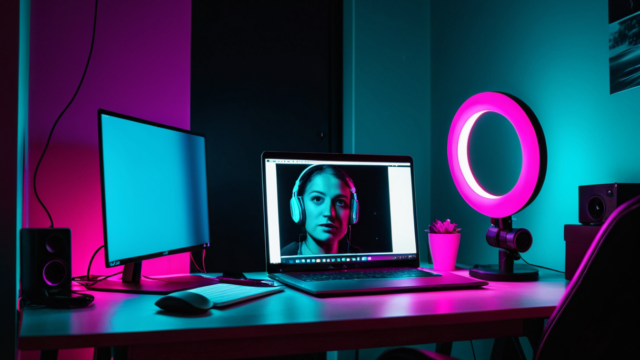
- Studio Setup: Typically involves a dedicated webcam or DSLR/mirrorless camera, an external microphone, a computer for encoding and streaming software (like OBS Studio), and often external lighting. Each component is usually specialized for its task.
- Hybrid Approaches: Some streamers use a smartphone for its camera, but connect it to a computer for processing and streaming, or use external microphones and lighting with their phone. This blends the portability of mobile with some quality benefits of a studio.
The fundamental difference lies in integration and specialization. A phone is designed to be a versatile, general-purpose device, while studio components are often purpose-built for high-fidelity audio and video capture. This doesn’t mean one is inherently “better” for all situations; it means they excel in different areas.
Practical Details Beginners Often Overlook
Starting with mobile streaming is accessible, but there are several practical considerations that can significantly impact your stream’s quality and your overall experience. These are details that studio setups often address with dedicated hardware, but mobile streamers need to proactively manage.
Power Management
Streaming is resource-intensive. Your phone’s processor, camera, and display are all working hard, which drains the battery rapidly. A typical phone might only stream for a few hours on a full charge before needing to be recharged. For sustained streaming sessions, you’ll need a reliable power source. This means either streaming while plugged into a wall outlet, or using a high-capacity power bank. Ensure your charging cable is long enough to allow you comfortable movement if you’re not stationary.
Internet Connectivity
A stable internet connection is paramount for any live stream. While mobile data (4G/5G) can work, Wi-Fi is generally preferred for its consistency and often higher upload speeds, especially if you’re streaming from a fixed location. Dropped frames or a pixelated stream are often the result of an unstable or slow internet connection. Test your upload speed before going live; you typically want at least 3-5 Mbps for a smooth HD stream.
Audio Quality
Your phone’s built-in microphone is convenient, but it’s designed for calls, not broadcast-quality audio. It picks up a lot of ambient noise and can sound distant. For a noticeable improvement, consider an external lavalier (clip-on) microphone or a small USB microphone designed for mobile devices. These are relatively inexpensive and can dramatically enhance your sound, making your voice clearer and more engaging for your audience.
Lighting
Good lighting can transform a mobile stream from amateur to professional-looking. Your phone’s camera performs best in well-lit environments. Natural light from a window is excellent, but if that’s not available or consistent, a simple ring light or a couple of small LED panel lights can make a huge difference. Avoid backlighting (light source behind you) as it will make you appear as a silhouette. Aim for soft, even front lighting.
Stability and Framing
Holding your phone by hand for an entire stream is rarely practical or steady. A wobbly camera is distracting. Invest in a phone tripod or a stable stand. This keeps your camera still and allows you to frame your shot consistently. Experiment with different angles to find what works best for your content and environment. Eye-level shots are often most engaging.
Getting Started with Mobile Streaming: A Step-by-Step Guide
Streaming from your phone can be surprisingly straightforward, offering a quick entry point into the world of live-cam broadcasting. Here’s how to set up your mobile studio for success:
- Choose Your Device and Platform: Start with a modern smartphone (typically released within the last 2-3 years) for optimal camera quality and processing power. Most live-cam platforms have dedicated mobile apps or a mobile-optimized website for streaming. Download the app or navigate to the site and log in to your broadcaster account.
- Secure Your Phone: Stability is key. Invest in a good phone tripod or stand. There are many affordable options available, from small tabletop tripods to taller, freestanding models. Ensure your phone is held firmly and at a flattering angle. An eye-level or slightly-above-eye-level angle is often recommended.
- Optimize Your Lighting: Natural light from a window is often the best and cheapest option. Position yourself facing the window. If natural light isn’t available or sufficient, consider a ring light or small LED panel. These are relatively inexpensive and can dramatically improve your video quality. Place the light in front of you, slightly above your phone’s camera.
- Improve Your Audio: While built-in phone microphones can work, an external microphone will significantly enhance your sound quality. Options range from lavalier (clip-on) mics that connect via your phone’s headphone jack or USB-C port, to small, directional shotgun microphones. Position the microphone close enough to capture your voice clearly without being distracting.
- Set Up Your Background: A clean, uncluttered background is essential. Think about what your viewers will see. A plain wall, a neatly organized shelf, or a decorative screen can work well. Avoid busy patterns or distracting elements. Ensure the area is well-lit and free of shadows.
- Test Your Connection: Before going live, check your internet speed. A strong, stable Wi-Fi connection is crucial for smooth streaming. If your Wi-Fi is unreliable, consider using a wired Ethernet adapter for your phone (requires an adapter) or ensuring you have a robust cellular data plan. Many platforms offer a pre-stream test feature.
- Configure App Settings: Within your chosen platform’s mobile app, explore the streaming settings. You can often adjust resolution (e.g., 720p, 1080p), frame rate, and sometimes even bit rate. Higher settings generally mean better quality but require more bandwidth. Start with a balanced setting and adjust as needed.
- Do a Test Stream (Private if Possible): Before your first public broadcast, do a short test stream. Some platforms allow private streams, or you can simply record a short video to review. Check your lighting, audio, framing, and internet stability. Make any necessary adjustments.
- Engage and Interact: Once live, remember to interact with your audience. Look at the camera, respond to chat messages, and maintain an engaging presence. Your phone’s screen will typically display your chat, allowing for easy interaction.
Common Mobile Streaming Mistakes and How to Fix Them
Even with the best intentions, mobile streamers can encounter common pitfalls. Here’s a rundown of frequent issues and practical solutions:
- Poor Lighting: Many new streamers rely solely on overhead room lighting, which can create harsh shadows and unflattering visuals.
- Fix: Position yourself facing a window for natural, soft light. If natural light isn’t available, invest in an inexpensive ring light or small LED panel. Place it directly in front of you, slightly above your camera, to illuminate your face evenly.
- Unstable or Shaky Video: Holding your phone by hand, even for short periods, often results in shaky footage that can be disorienting for viewers.
- Fix: A tripod or sturdy phone stand is a non-negotiable accessory. There are many affordable options, from small desktop models to taller, adjustable tripods. Ensure your phone is securely mounted and at a stable height.
- Subpar Audio Quality: The built-in microphone on phones can pick up a lot of ambient noise and often makes voices sound distant or muffled.
- Fix: Upgrade to an external microphone. Lavaliere (clip-on) mics are discreet and effective, connecting via your phone’s audio jack or a USB-C adapter. Small USB microphones can also offer significant improvements. Position the mic close to you for clear audio.
- Distracting Backgrounds: A cluttered bedroom, a pile of laundry, or a busy street scene can pull focus away from you and your content.
- Fix: Keep your background simple and clean. A plain wall, a neatly organized bookshelf, or a decorative screen works well. Ensure the background is well-lit and doesn’t have any reflective surfaces that could cause glare.
- Weak or Inconsistent Internet Connection: Streaming requires a steady upload speed. A fluctuating Wi-Fi signal or slow cellular data can lead to buffering, pixelation, and dropped streams.
- Fix: Always try to stream over a strong, stable Wi-Fi connection. If possible, position yourself close to your router. For critical streams, consider using an Ethernet adapter for your phone (if compatible) to get a wired connection, or ensure you have a robust 5G or 4G data plan with good signal strength in your streaming location.
Mobile vs. Studio Setups: Key Comparisons and Trade-offs
Deciding between a mobile phone and a dedicated studio setup involves weighing various factors, from initial cost to overall production quality and flexibility.
Cost
- Mobile Setup: The entry cost for mobile streaming is significantly lower. You likely already own a smartphone. Essential accessories like a tripod, ring light, and basic external microphone can range from $50 to $200 in total. This makes mobile a very accessible starting point.
- Studio Setup: A full studio setup, including a dedicated webcam or DSLR/mirrorless camera, capture card, professional lighting (softboxes, key lights), a high-quality microphone, and a powerful PC, can range from $500 to several thousand dollars. This investment reflects higher performance and greater control.
Video Quality
- Mobile Setup: Modern phone cameras are impressive, often capable of 1080p or even 4K resolution. However, they typically have smaller sensors and less advanced optics than dedicated cameras. Video quality can be very good in ideal lighting but may struggle in low-light conditions, showing more noise or less detail.
- Studio Setup: Dedicated webcams offer consistent 1080p quality, while DSLR or mirrorless cameras with appropriate lenses can deliver superior image clarity, dynamic range, and low-light performance. They also offer greater control over depth of field (bokeh) and color science, leading to a more professional, cinematic look.
Audio Quality
- Mobile Setup: While an external phone mic is a vast improvement over the built-in one, these tend to be simpler, often omnidirectional, and may still pick up more ambient noise than higher-end options.
- Studio Setup: Dedicated USB microphones or XLR microphones paired with an audio interface offer superior sound capture, often with directional patterns (cardioid, hypercardioid) that focus on your voice and reject room noise. This results in richer, clearer, and more professional-sounding audio.
Flexibility and Portability
- Mobile Setup: Unbeatable portability. You can stream from almost anywhere with a decent internet connection. This is ideal for impromptu streams, travel, or broadcasting from various locations within your home. Setup and teardown are typically very quick.
- Studio Setup: Less portable. A full studio setup is generally fixed in one location due to the multiple components, cables, and power requirements. Moving it frequently can be cumbersome and time-consuming.
Control and Customization
- Mobile Setup: Mobile apps offer a streamlined interface with fewer granular controls. While you can adjust basic settings like resolution, frame rate, and sometimes exposure, advanced features like manual focus, white balance presets, or detailed color grading are often limited or absent.
- Studio Setup: Provides extensive control. Dedicated streaming software (e.g., OBS Studio) allows for multiple camera angles, scene switching, custom overlays, advanced audio mixing, green screen effects, and precise control over every aspect of your broadcast. This allows for a highly polished and customized presentation.
Reliability and Performance
- Mobile Setup: Can be highly reliable, but performance can be impacted by phone heat, background apps, and system updates. A phone’s processing power is shared among many tasks, potentially leading to dropped frames or app crashes during long streams.
- Studio Setup: A dedicated PC or Mac for streaming typically offers more stable performance, especially during extended broadcasts. Components are designed for sustained workloads, and dedicated software provides robust control and stability.
Ultimately, the choice depends on your budget, desired quality, and streaming goals. Mobile streaming is an excellent starting point for new broadcasters, offering a low barrier to entry and great flexibility. As your audience grows and your needs evolve, upgrading to a hybrid or full studio setup might become a natural progression to achieve higher production values.
Privacy, Safety, and Financial Considerations
When choosing between mobile and studio setups, it’s crucial to consider the practical implications for your privacy, safety, and finances. While mobile streaming offers undeniable convenience, it also introduces a unique set of considerations.
From a privacy standpoint, mobile devices are inherently more portable and often used in various personal settings. This means you need to be extra vigilant about your surroundings. A quick scan of your background before going live is always a good practice, even if you think you’re in a private space. Be mindful of reflective surfaces, windows, or open doors that could inadvertently reveal personal information or unintended parts of your environment. Location services on your phone should also be reviewed; while not typically broadcast, understanding your device’s settings is good practice. For studio setups, the environment is usually more controlled, making it easier to manage what’s visible on camera.
Safety is another significant factor. With a mobile setup, especially if you’re streaming from public or semi-public locations (which we generally advise against for privacy reasons), you might be more vulnerable to unexpected interruptions or even having your device compromised. A dedicated studio, even a home-based one, offers a more secure and predictable environment. Always prioritize your physical safety and never put yourself in a risky situation for a stream. Ensure your mobile device is password-protected and that you’re using secure, private networks when streaming to prevent unauthorized access to your data.
Financially, mobile streaming typically has a much lower barrier to entry. You’re likely already in possession of a smartphone, and many platforms offer free or low-cost streaming apps. This can be a huge advantage for new streamers or those on a tight budget. However, while the initial cost is low, consider potential hidden costs. Frequent streaming can accelerate battery degradation, and you might eventually need to upgrade your phone more often than if you were using a dedicated studio camera. Data plans are another consideration; high-quality streaming consumes significant data, so an unlimited plan or strong Wi-Fi connection is essential. Studio setups, conversely, involve a larger upfront investment in cameras, lighting, microphones, and potentially a dedicated streaming computer. However, these investments are often more durable and upgradeable over time, potentially leading to lower long-term replacement costs for specific components.
Ultimately, both approaches have their merits. Mobile offers flexibility and cost-effectiveness, but demands heightened awareness of your surroundings and data usage. Studio setups provide a controlled, professional environment, but require a larger initial investment. Your choice should align with your comfort level regarding privacy, your personal safety considerations, and your financial planning.
Mobile vs. Studio: 5 Key Differences
- Mobile streaming offers unparalleled portability and ease of setup.
- Studio setups typically provide superior video and audio quality with more control.
- Smartphones are constantly improving, narrowing the gap in quality for casual streaming.
- Dedicated studio equipment allows for greater customization and professional-grade results.
- Privacy is paramount; always check your background and device settings when streaming from mobile.
- Safety should always be your top priority, especially when considering public streaming locations.
- Mobile streaming has a lower initial cost but consider long-term data and device wear.
- Studio setups require a larger upfront investment but offer more durable and upgradeable components.
For more tips on optimizing your streaming experience, visit CamStars.